Troubleshooting Fiber on the Cheap
November 21, 2019 / General, 101 learning, Upgrading and troubleshooting, Best Practices
If you troubleshoot fiber on a regular basis, you probably have an array of tools to help you do the job, including an Optical Time Domain Reflectometer. But we often get questions from customers who don’t troubleshoot fiber enough to justify such an expensive tool.
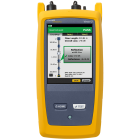
Of course, if your fiber links are critical, and you can’t afford to wait for someone with an OTDR to come and figure out what is wrong, then it makes perfect sense to have that tool around, even if you rarely use it. That’s common in data centers and colocation sites where they aren’t interested in waiting a day or two to fix a bad fiber link. The OptiFiber Pro is a popular choice in those situations, because the automated setup and Event Map make it so easy to find problems, even if it’s been a while since you last picked it up.
Not everyone has the budget of a big data center, so what can you do on the cheap? Here are some thoughts.
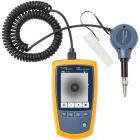
First, the most common cause of fiber optic failures is endface contamination. Even if you know everything was clean when it was put together, and it’s never been touched, somehow dirt can get in there. (Typically, the culprit is an employee going by the name of “Not Me”.) If a link suddenly starts misbehaving (lots of errors reported or it stops working altogether), a quick look with a basic fiber inspection camera such as our FI-500 FiberInspector™ Micro can find the problem. Of course, you’ll have to find and look at all the interconnections in the link until you find the offending connection. If there are MPO cassettes in the path, you won’t be able to examine those without a more costly MPO camera. And once you’ve found the dirt, you need some cleaning supplies and techniques to deal with it. (Of course, you have those anyway, right? If not, stop reading now and order some.) A real cheapskate could skip inspection and disconnect every link and clean it, but that runs the risk of making things worse – disconnecting and cleaning something that’s clean might end up making it dirty, and you won’t know without inspecting it.
Second, you could get a visual fault locator (VFL) such as our VisiFault™ – this device illuminates a fiber with a visible laser, which will “leak” at points where connections are bad, or the fiber is bent or broken. These work well if you can visually inspect the entire fiber run – not so great if it’s two kilometers long and goes through a conduit underground. On the other hand, it’s unlikely that the fiber broke in the underground conduit – the interconnection points and equipment cords are much more likely culprits. VFLs are especially helpful for identifying bad splices when using splice-on pigtails since they are near the end of the link. However, the VFL won’t help you find a dirty connector.
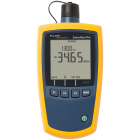
Third is a Power Meter, such as our SimpliFiber Pro, which can display the power of the signal on an active fiber. With a power meter, you can do some divide-and-conquer troubleshooting. Let’s say the link between two devices is causing problems – errors, intermittent, or just down. Start by plugging the power meter into the output of the device. The power meter tells you how much light is coming out of the transceiver or the end of the fiber. For a link to work, you need a given level of power, which is measured in dBm. How much signal is required really varies, so check your transceiver’s transmit and receive specs. With single-mode you may be able to work with a signal as low as –28 dBm or as strong as –0 dBm or stronger. With multimode, and VCSEL transmitters you should also expect a power measurement in the low single negative digits at the source. If both devices are sourcing sufficient power, but the signal is weak or nonexistent at the other end, you’ve got a bad fiber. It might be dirty (inspect, clean and inspect to make sure your work was effective – at both ends), poorly connected, or damaged. If you add a light source to your power meter (commonly sold as a kit), you can measure the loss on the fiber to make sure it’s in spec. You can find loss limit specifications for nearly any application in our Versiv Limits Lines document by searching for your application (i.e.: “40GBASE-LR4”)
Fourth, if you really want to know what’s going on, you’ll need an OTDR, such as our OptiFiber Pro which will allow you characterize not only the loss of the link, but each connector and fault along the way, with a distance to each. You’ll also be able to see the reflectance of each event on the fiber, which is becoming a more critical factor in single-mode applications. The OptiFiber Pro even includes a built-in VFL and you can add an inspection camera and power meter options for an all-in-one toolkit. Once your boss understands how much power you can get in the OptiFiber Pro, getting approval should be a slam dunk.


