Single fiber testing - DTX xFM Series
You can set the remote unit to a steady source, allowing the testing of a single fiber without the need to purchase an additional source.
- Rotate the dial to SETUP > Remote End Setup > Far End Source
- Select your test limit (read the notes at the end of this article)
- Go to Tab 2 and set the Number of Adapters, Number of Splices, Connector Type and Test Method.
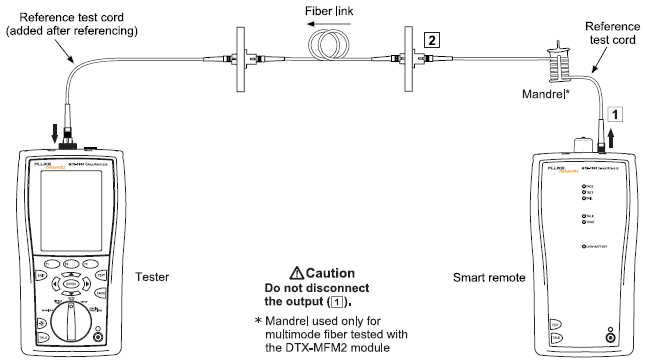
- Connect your reference cord as shown below.
- To set the remote source to a constant wavelength, press and hold the button for 3 seconds.
- If you press it for less than 3 seconds, the VFL will be turned on. Press the button two times and then hold for 3 seconds.
- This will set the steady wavelength for 850 nm or 1310 nm. If you need 1300 nm or 1550 nm, press the button again briefly.

- Rotate the dial to SPECIAL FUNCTIONS > Set Reference > ENTER > TEST > xx nm.
- Remove the reference patch cord from the INPUT PORT ONLY (Main unit).
- Put a known good patch cord into the INPUT port and connect to your link to be tested
- Rotate the dial to AUTOTEST > TEST
Setting your test limit
In Smart Remote Mode, you would typically select a standard such as TIA 568B Backbone MM. This would calculate the test limit (loss budget) for you. In Far End Source Mode, the DTX cannot calculate the loss budget for you. To calculate the loss budget for your link, the DTX needs to know the length of the link. Since the DTX cannot measure the length of the link in Far End Source Mode, it cannot calculate a loss budget. You will have to calculate the loss budget yourself and enter it manually in the DTX. For more information on calculating loss budgets - click here To enter your own loss budget, you will need to create a custom test limit..
- Rotate the dial to SETUP > Fiber > ENTER > F1 More > Custom > F1 Create.
- First, decide the test limit name. Press ENTER and change the default name followed by pressing SAVE.
- Select Use Default Values From > ENTER > Application > General Fiber Optic
- Set the maximum length limit.
- Set the maximum loss allowed for 850 nm, 1300 nm or 1310 nm and 1550 nm.
- Press SAVE. (Most people forget to do this!)
- Press ENTER to select your new test limit.
- You are now ready to set your reference and test.
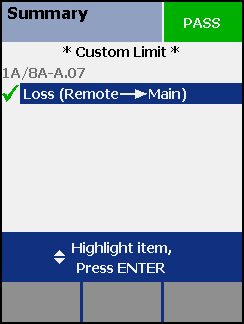
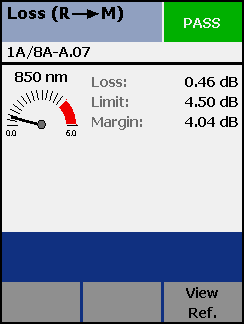
Example test result:
|
|
---------> |
 |